

Photoshop Tutorial 2: Introducing SMUUUUUUUUDGE!!

This will be another short entry for my TK17 Screenshot dedicated Photoshop Tutorial. You can read Part 1 by clicking right here! Once again, a disclaimer is in order, so, on with it!
DISCLAIMER: This is meant to be a very basic guide written by a mentally challenged person. This is not:
1. An extensive tutorial on how to use Photoshop.
2. A step-by-step all-in-one solution to picture issues.
3. A guide to hack the son of a bitch on Instagram who claimed to donating you 0.15 BTC only for him to send them through a shady website with no info on Google and yet requiring you deposit 0.01 BTC of your own to "validate your account" after which you spend over a month struggling and fighting with family over the lack of money only for your Instagram account to be HACKED BY THE SON OF A WHORE WHO PROBABLY JUST STOLE BACK THE BITCOIN ALONG WITH YOUR POORLY INVESTED MONEY MOTHERFUCKER I WILL KILL YOU!!  Erm, I mean... Back to the tutorial now... Also, fuck crypto dudes.
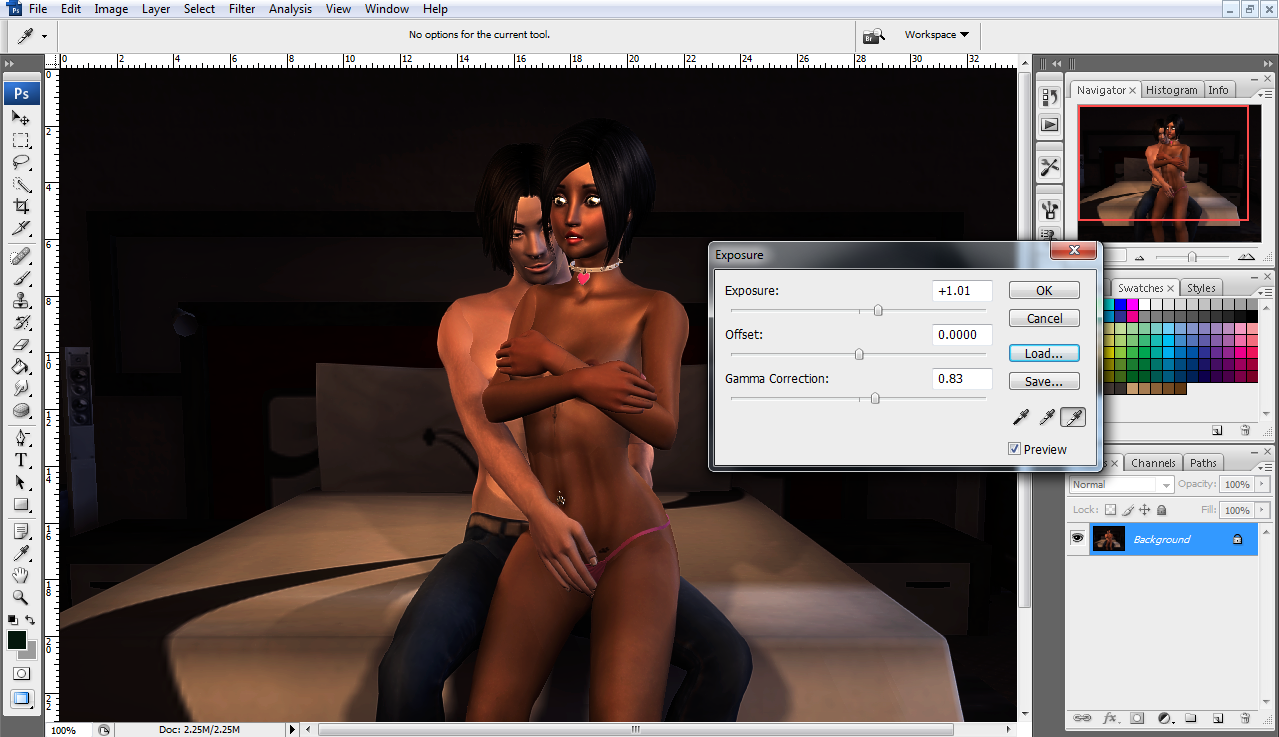
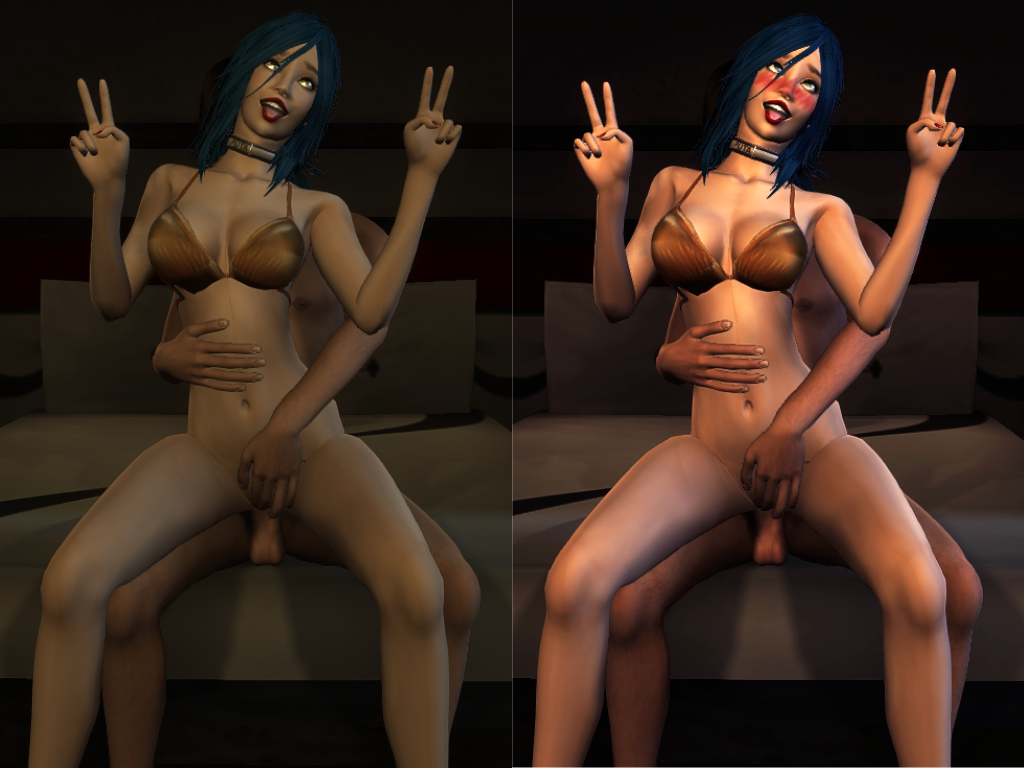
So, this is where we left off last time. We introduced the Levels, Brightness/Contrast and Exposure tools. These tools affect the entirety of the image and can be slightly tweaked to achieve certain effects. However, we're not close to being done. Oh no. What comes next is the ultimate in making your screenshots go from good to amazing. I give you... *drum roll followed by a brutal death metal like scream* SMUUUUUUUUUUUUUUUUUUUUUUUDGE!!!!
The Smudge tool is going to be the tool you will rely on the most for editing parts of your pictures that look the most unsightly. Namely, I don't know if you can tell from the previous picture, but there are some distinct lines around the joints for Nanno's and Marco's arms, hands and torso indicating where the joints of the models are. But that's a concern for future Trapp. Right now we want to focus on getting the eyeball glow fixed.

Use your Smudge tool and make sure to zoom in to the problematic part. There, choose the brush size of your preference. As an added note, all my screenshots are sized 1024x768, which is the standard output resolution for TK17 screenshots (feel free to correct me if I'm mistaken). So obviously, using a large sized brush for the Smudge tool will fuck up the entire area it covers, so be careful and gentle with it, like you would your girly.
For such a small resolution, I will usually go with a 1 size brush for the eyes, since there are very few pixels in that area and again, you want to be precise. So the first thing I did was slowly close up a circle of sorts where the eye iris is. When using the Smudge tool you need to remember that it is constantly tracking colors. What does that mean, though? It means, the area the cursor hovers over will pick up that specific color. If you move the cursor, it will track whatever color is beneath it. So if you, say, want to drag a green or a blue pixel but you end up smudging a pixel of a very different color, all surrounding pixels will be affected.
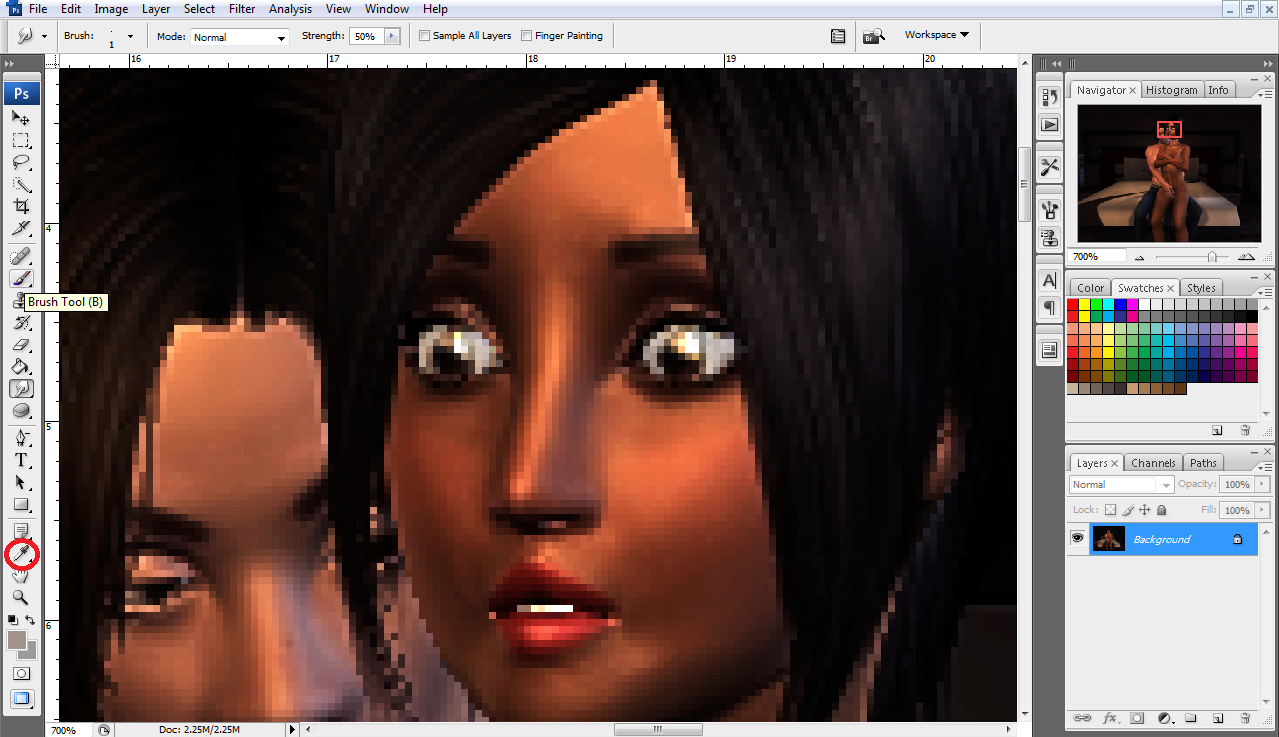
This is the result of my Smudging. It's not quite clean yet but there is a defined boundary between eye iris, sclera and the eyeball glow. From here, the next thing I did was use the Eyedropper Tool (circled in red on the pictured) to try and pick up the closest color to white that I could. Why? To use the Brush tool, of course! The Brush tool, what it does is, it will paint over a specific area. And in the case of this pic, that specific area is the eye white. I realize in hindsight I could have done a waaaaay better job by painting the eye white over a different layer, but I'm just that retarded.
Aaaaaaanyways, the reason you want to use the Brush tool is to COMBINE its effects with the Smudge tool. This will come in handy as we go over the next part of the tutorial, but for now, we obviously don't want our eye white to be entirely white. That's where Smudge comes in, to drag some color into specific parts of our picture. In order for the eyes to lose that Uncanny Valley characteristic after editing, we need to be measured in our use of both the Smudge and the Brush tools. Since this was my first try, I don't think there is much else that can be done at this point, but here's the end result from a zoom out:
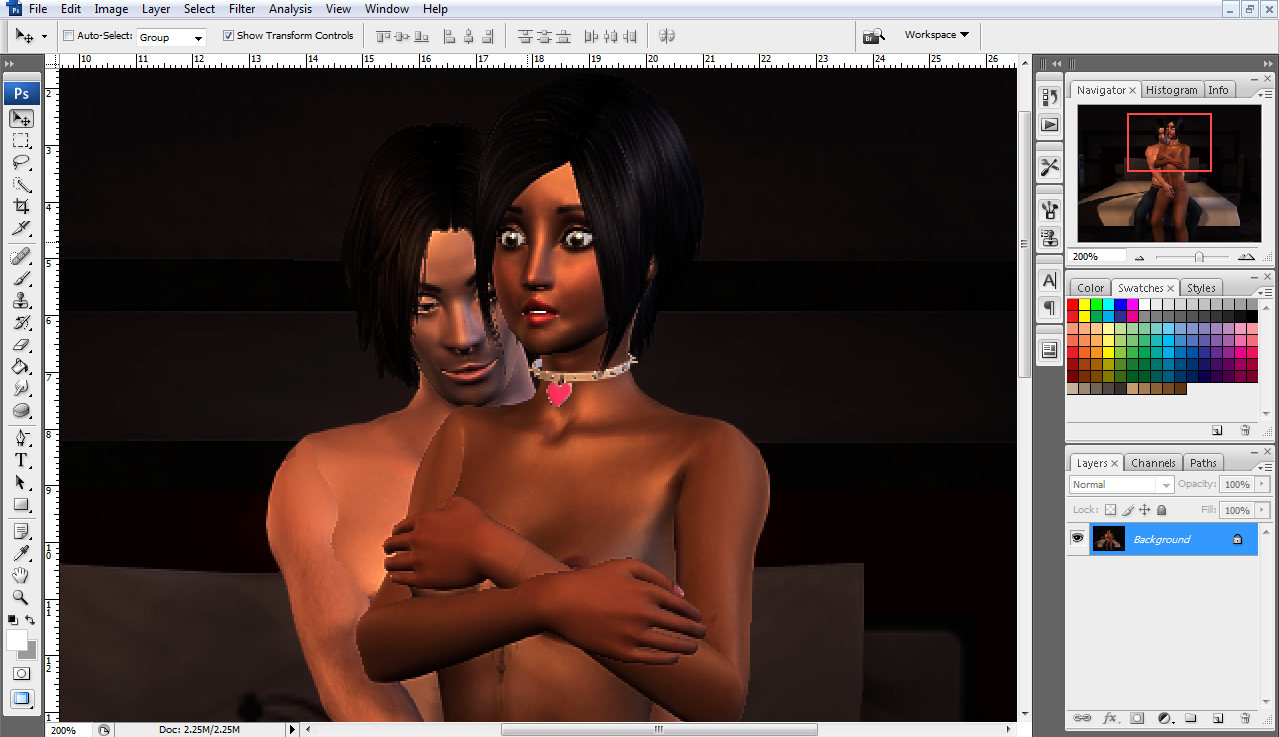
There doesn't seem to be anything inherently weird about it until we zoom back in. How this may look to you is entirely subjective, but I agree that there's plenty of room for improvement here.
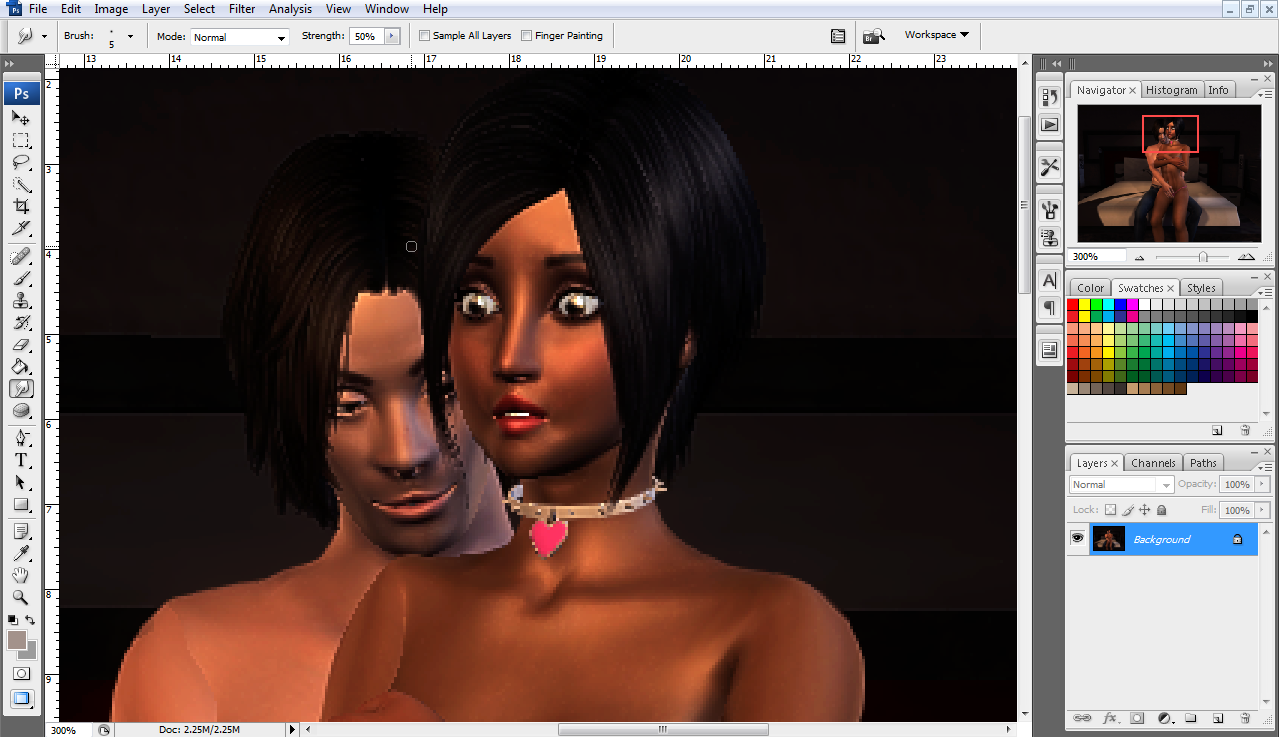
Also worth noting to wrap this post up is that I used a larger sized brush on the Smudge tool to get rid of those fugly texture lines on Nanno's shoulders by simply brushing along the collarbone and illuminated skin. As a final note for this part of the tutorial, I must address this:
Photoshop's (or any photo editing software) tools are very destructive. What I mean by that is, THEY DO NOT WORK ON A SINGLE PIXEL BASIS. They affect surrounding pixels as well, which results in some serious alterations to the image, even with a brush size set to 1 pixel. When using the Smudge or Brush tool to lighten the eye white or getting rid of body texture lines, BE CAREFUL. Remember that the larger the brush size, the bigger the number of pixels affected by your usage of these tools. And your models standing out won't now as much if you're not surgical with these. I learned this part the hard way when putting together material for the next part of the tutorial, and believe me: Mistakes like these will cost you time and effort to solve, making you even fully ditch your entire photo edit.
That is it for this post. I hope some of you are taking these tips to heart and starting to make your pictures look awesome. On part 3 I will show you step by step how to get from a dark, undefined image to a bright, vibrant one with a bit of "special effects" to it. See you then!
-
 2
2
-
 1
1
-
 2
2


2 Comments
Recommended Comments