

How to personalize a skin texture for your model (Part 04)/Como personalizar a textura de seu modelo (parte 04)

Now let's talk about tattoos!
In this part, I'll show three different ways on making tattoos for your model and how to add them!
Agora vamos falar de tatuagens!
Nessa parte, vou mostrar três formas diferentes para fazer tatuagens para seu modelo e como colocar neles!
I'll begin with Mari's first tattoo: When she run away from her country, in 1977, she joined in a gang of punks in Nagoya, Japan. She soon fell in love with the punk movement, and along with it, their ideologies, like Anarchism and Communism. Her first tattoo reflects that: It depicts a working gueixa murdering her patron overlord, he bleeds demons, showing his true nature of explorer of the people. At the same time, she sets herself free. I've find a nice tatoo depicting that made in an anonymous men's leg by the artist Silly Jane it's perfect for Mari's half-sleeve tattoo!
Vou começar pela primeira tatuagem de Mari: Quando ela fugiu de seu país, em 1977, ela se juntou a uma gangue de punks em Nagoya, Japão. Ela rapidamente caiu de amores pelo movimento punk e suas ideologias, como o Anarquismo e o Comunismo. Sua primeira tatuagem reflete isso: Mostra uma gueixa assassinando com suas próprias mãos seu senhor. Ele sangrea demônios, mostrando sua verdadeira natureza de explorador do povo. Ao mesmo tempo ela se liberta. Eu achei uma ótima tatuagem dessa cena, feita na perna de um homem anônimo pela artista Silly Jane. É perfeito para a tatuagem half-sleeve da Mari!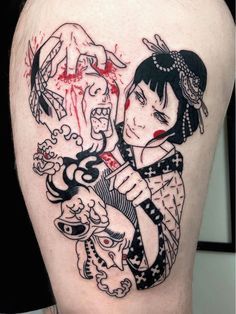
This image is very usefull for what I want to do because it's very clear, and in a relativelly flat surface. Let's open it in Photoshop!
Essa imagem é muito útil para o que eu quero, porque ela é bem clara e posta numa superfície relativamente plana. Vamos abri-la no Photoshop!
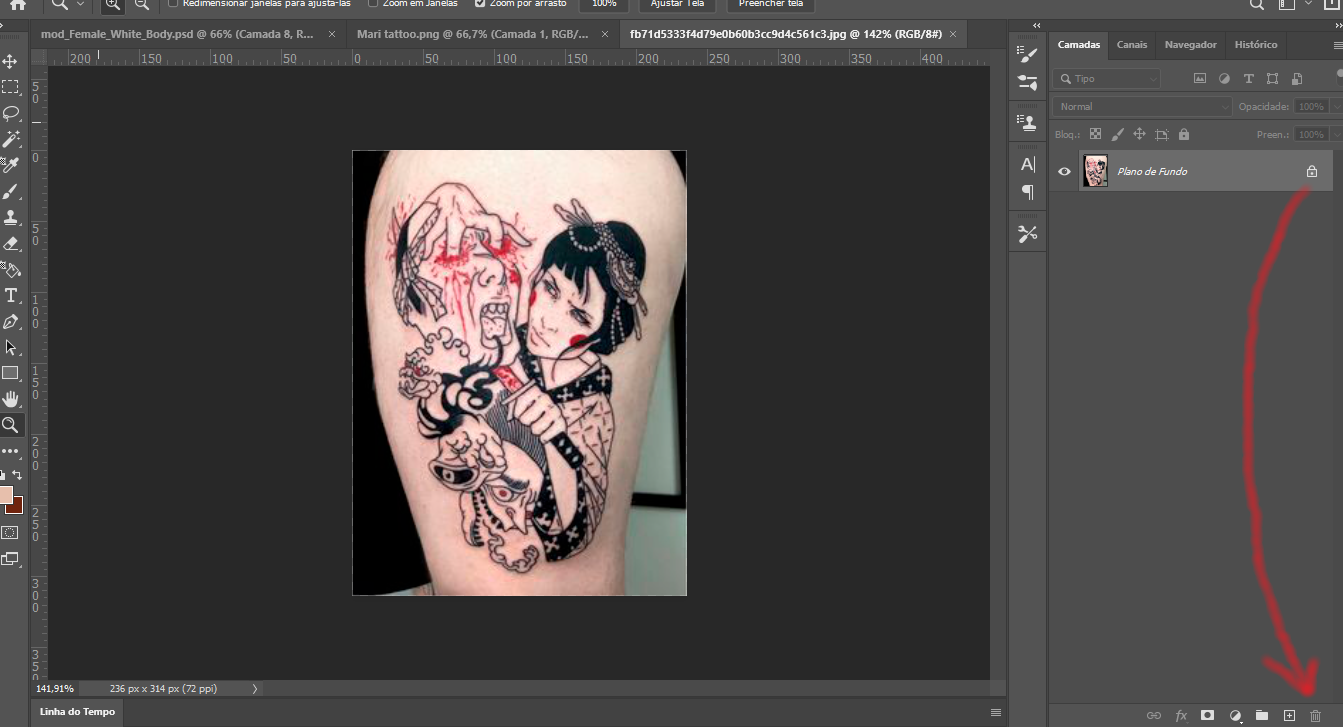
First thing you need to do is transform the image into a layer, so we can drag it to our skin later. To do this is simple, go to the layer tab. Instead of a layer, you'll see that the image is labeled as "Background" and with a padlock simbol next to it. Click on the padlock and drag it to the trash can on the bottom of the pannel. Here you go! now you have the image as a layer!
Primeira coisa que você precisa fazer é tranformar a imagem em uma camada, assim podemos arrastá-la para nossa textura de pele depois. Para fazer isso é simples, vá para a aba camada. No lugar de uma camada, você verá que a imagem é chamada de "Plano de Fundo" e com um símbolo de cadeado ao seu lado. Clique e arraste o cadeado até a lata de lixa no fundo do painel. Tá aí! Agora você tem a imagem como uma camada!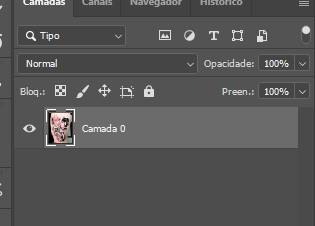
Now we need to remove from the image the elements we don't want, like the wall on the background, the shorts fabric and the skin surface that's not covered by the tattoo. To do this, we'll need a series of tools. Let's begin with out lasso. Try to roughly select the tattoo, leaving out most of the other undesirale elements you can:
Agora precisamos remover da imagem os elementos que não queremos, como a parede no fundo, o tecido do short e a superfície de pele não coberta pela tattoo. Para fazer isso, usaremos uma séria de ferramentas. Vamos começar pelo lasso. Tente fazer uma seleção aproximada da tatuagem, deixando o máximo de outros elementos indesejados de fora: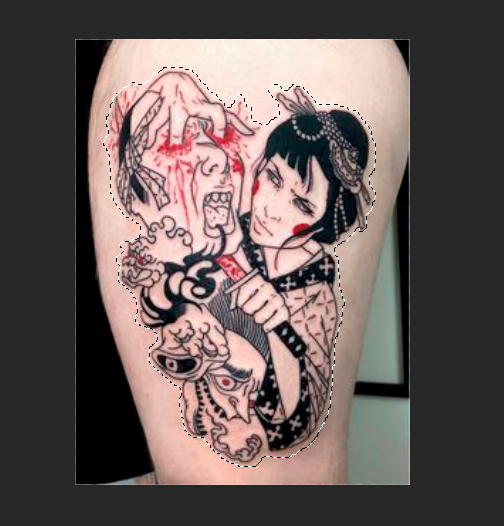
The selection should look more or less like this:
A seleção vai ficar mais ou menos assim:
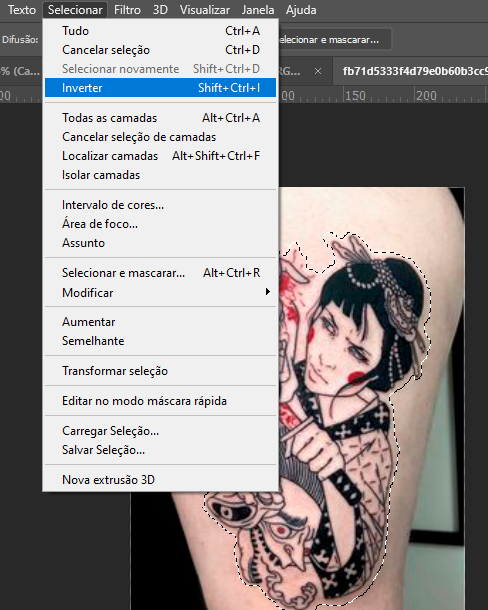
Now you must click on the "Select" tab on the command tab and select "Invert" function, this will invert the selection. Now everything EXCEPT the tatoo is selected.
Now press delete and you should have this result!
Agora você deve colocar na aba "Selecionar" na aba de comandos e selecionar "Inverter", isso irá inverter a seleção. Agora tudo EXCETO a tatoo está selecionado.
nullAgora pressione delete e você deve obter esse resultado!
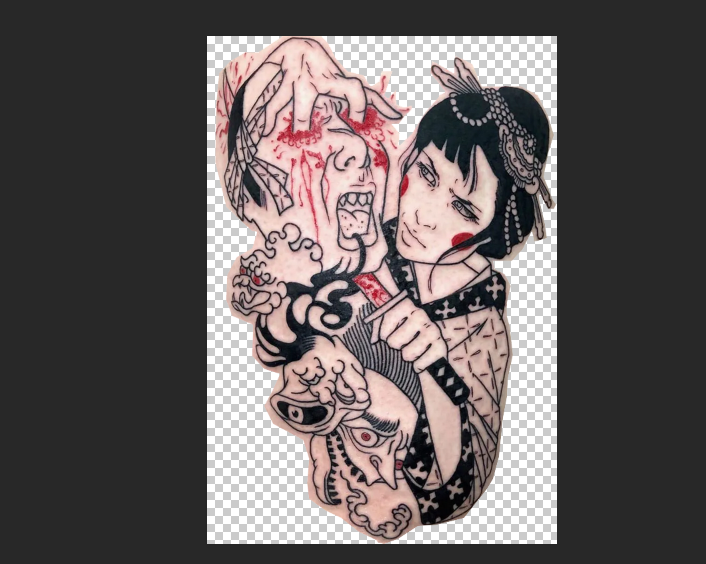
It's almost done already! But not yet. Now I want to remove all traces of the original skin (at least the most I can) to add the tat to our model's skin. To do that we need some other tools to help us: We already have the lasso, and it could be very helpfull for this fine-tuning, but there also the magi wand: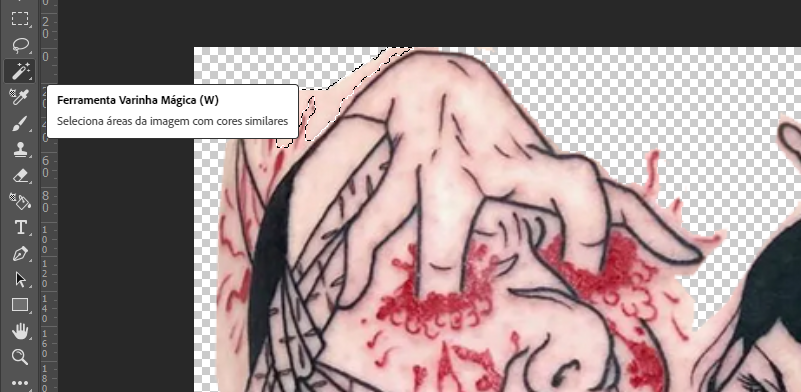
The Magic Wand (W) automatically makes a selection of the image that's have the same color, on the image's example, I pressed on top of the hand of the gueixa, and it selected a patch of skin that's have the same color range.
You can increase or decrease the tolerance so the magic wand selects more or less of the target color range. But be carefull not to select parts of the drawing! When satisfied, delete the selection.

A Varinha Mágica (W) seleciona automaticamente parte da imagem que tem a mesma cor. No exemplo, eu cliquei com ela acima da mão da gueixa, e ela selecionou uma parte da pele com mesmo alcance de cor.
Você pode aumentar ou diminuir a tolerância na qual a varinha mágica seleciona mais ou menos da cor selecionada. Mas tenha cuidado para não selecionar partes do desenho! Quando satisfeito, delete a seleção.
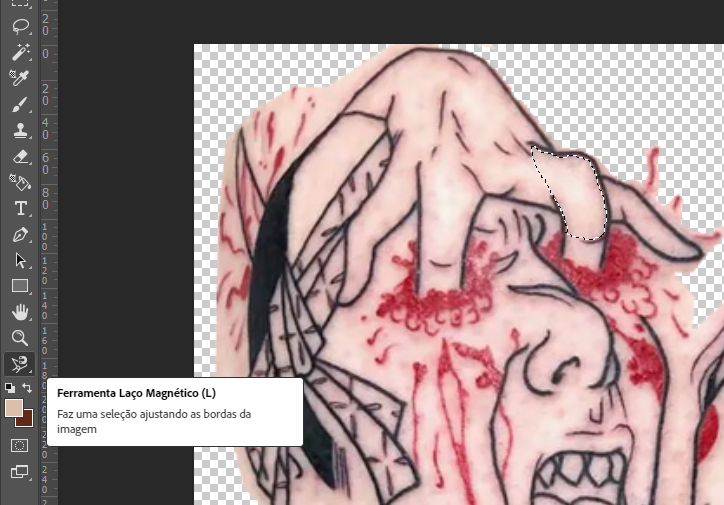
Next tool is the magnetic lasso - The magnetic lasso also makes selections and it works like this: Like the lasso, you click on where you want to begin, then you just hover with the mouse along the lines of the drawing, the magnetic lasso will automatically try to select the intended area that the mouse is hovering, but following next to the target color. Sometimes you need to click once to make a "waypoint" that the magnetic lasso must cross. Magnetic lasso can be usefull to make fine adjustments of small areas, but use it carefully. Remember, you can allays redo your steps (Ctrl + Z).
Próxima ferramenta é o lasso magnético - O lasso magnético também cria seleções e funciona assim: Como o lasso, você clica onde você quer ocmeçar, então apenas paire o mouse junto das linhas do desenho, o lasso magnético vai altomaticamente tentar selecionar a area intencionada qua o mouse pairou, mas seguindo próximo da car alvo. às vezes é necessário clicar no caminho para fazer uma "marca" que o lasso magnético precisa cruzar. Lasso magnético pode ser útil para fazer ajustes pequenos de áreas pequenas, mas use com cuidado. Lembre-se que ovcê sempre pode desfazer e refazer seus passos (Ctrl +Z).
Finally we have the eraser, just click and drag with it on the part you want erased!
Finalmente nós temos a borracha! É um ferramenta bem simples, apenas clique e arraste na parte em que você quer apagada e pronto!

With all these tools it's possible to remove everything we don't need of the image. It's long and boring work, it'll take some time.
Com todas essas ferramentas, é possível remover tudo que não será necessário da imagem. É um trabalho longo e chato, vai levar algum tempo.
Still there? Look how it's now! Ainda aí? Olha o resultado!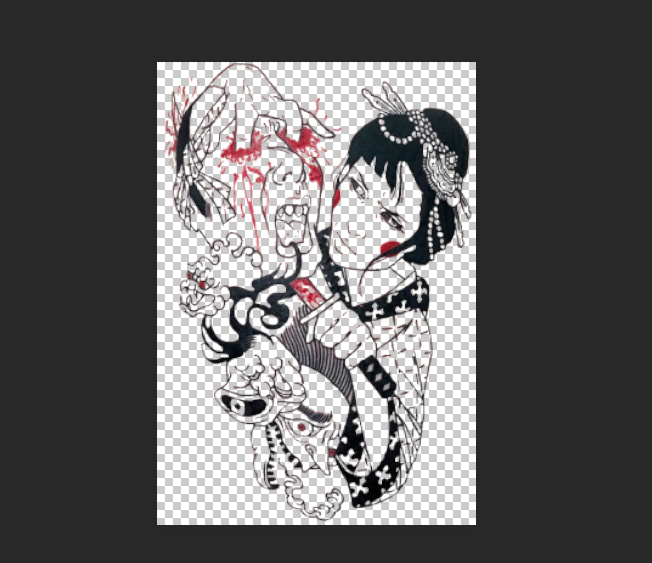
Now let's tranfer the finished work to our skin texture! just drag the layer to the skin texture window.
Agora vamos transferir a tattoo terminada para a textura de pele! Apenas arraste a o trabalho para a janela da textura de pele.
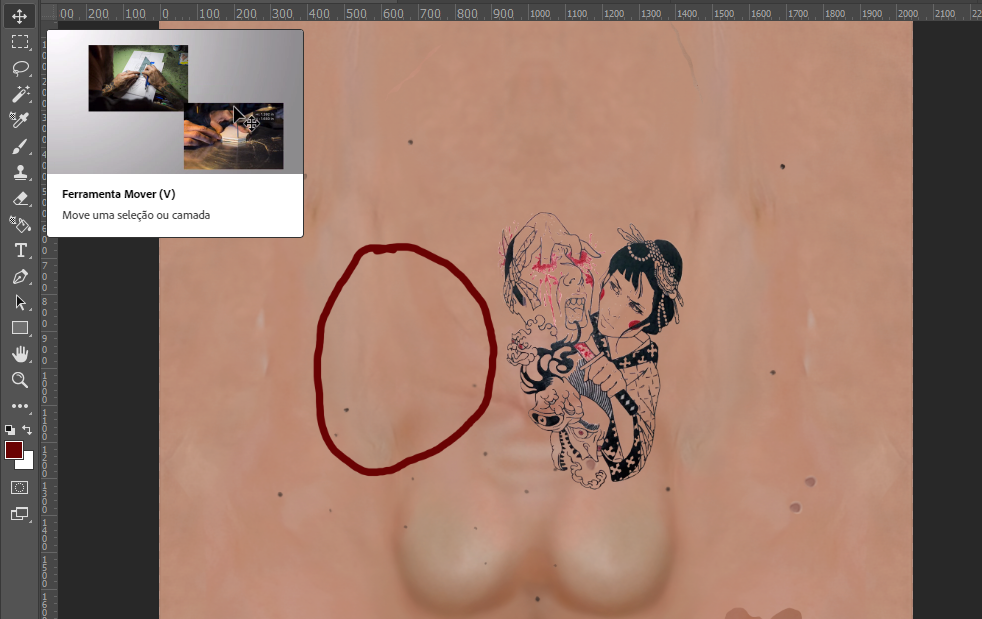
To drag just use the move tool (highlighted in the screenshot). Now, I want it to be a shoulder/half sleeve tattoo on Mari, it will be on her right shoulder (where the red circle is). The image should be upside down for this. Let's do this!
Para arrastar apenas use a ferramenta mover (exposta na captura de tela). Agora eu quero que ela seja uma tatuagem de ombro/half-sleeve na Mari, será no seu ombro direito (onde o círculo vermelho está). A imagem deveria estar de cabeça para baixo para isso. Vamos fazer!
Select the tattoo layer and press Ctrl+T
Selecione a camada da tattoo e pressione Ctrl +T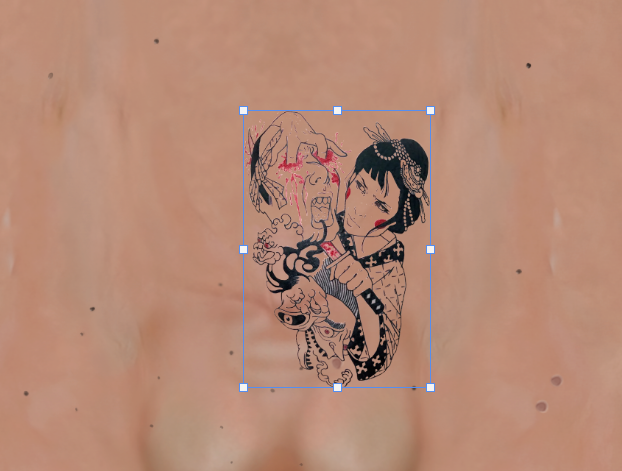
Go to the Edit tab on the command tabs, choose "Tranformation" or something like that and then "turn horizontaly"
Vá para a aba editar nas abas de comando, escolha Transformação e então "virar horizontalmente".
 null
null
It's done! Now we just need to adjust in the desired place, shrinking and turning the image using the guides shown when you press Ctrl+T. At first is a guesswork. Place where you think it will be right, save on .png only and don't close the image editor and test ingame, if it's not good yet, try again untill you get it right. When it's right, save the .pds too! If there are some colors imperfectioons, just use the guidelines from saturation manipulation found on the part one on the tattoo.
Está pronto! Agora nós precisamos ajustar no lugar desejado, diminuindo e virando a imagem usando as guias que aparecem quando pressionamos Ctrl+T. No começo é um trabalho de adivinhação. Coloque onde ovcê acha que ficará certo. Neste ponto salve em .png apenas e não feche o editor de imagens. Se não estiver bom, tente novamente até acertar. Quando estiver bom salve em .pds também! Se houverem algumas imperfeições de cor, apenas use o guia de manipulação de satruração e tom encontrados na parte um na tatutagem!.
The final result. O resultado final.
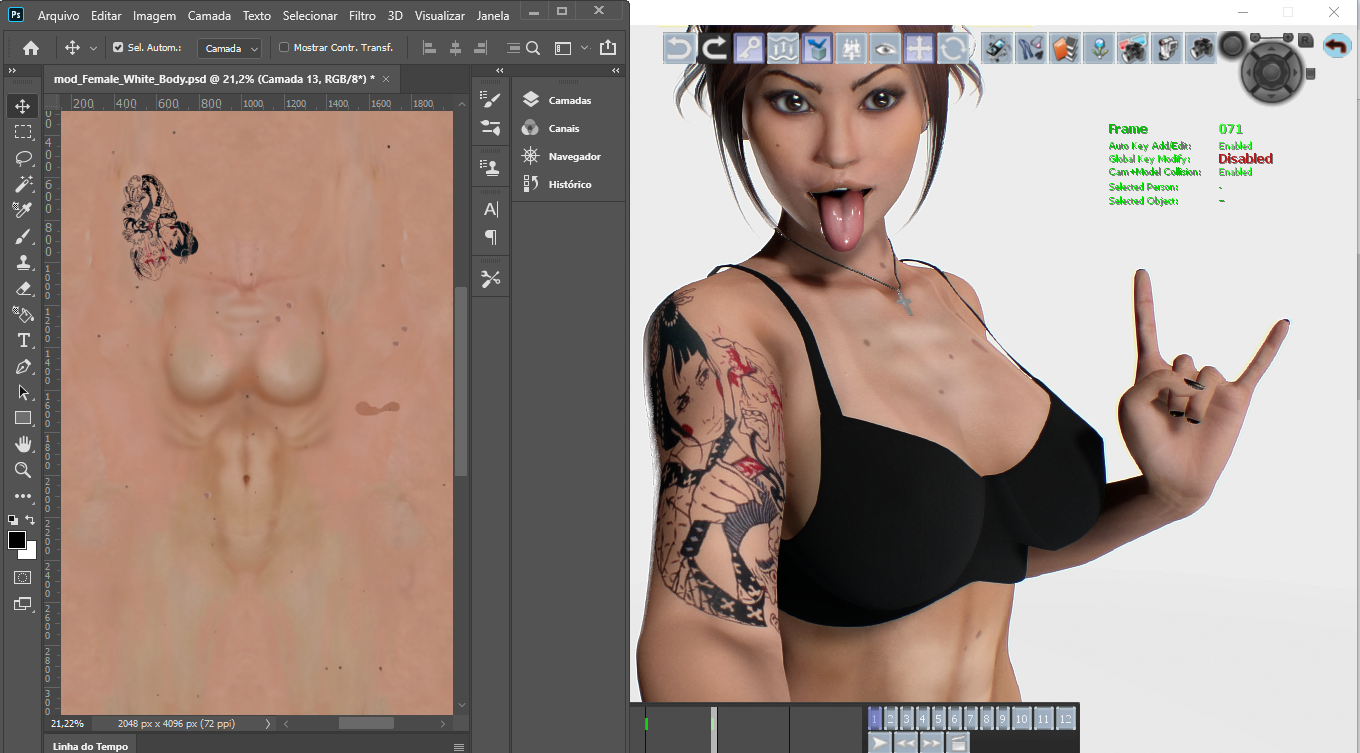
Fair warning: I've placed this first tattoo on the right arm, but it's not going all the way behind the arm, as you can see. You may notice a fine line on the arm, this is where te texture parts ends and connects with the other end. To place a image occupying this border can be very tricky, not to say maddening. I tried to do this, but gave up because it would take too long for this tutorial, the same can be said for full back tattoos, but I promise I'll do an "advanced" tutorial with guidelines on how to make these difficult feats.
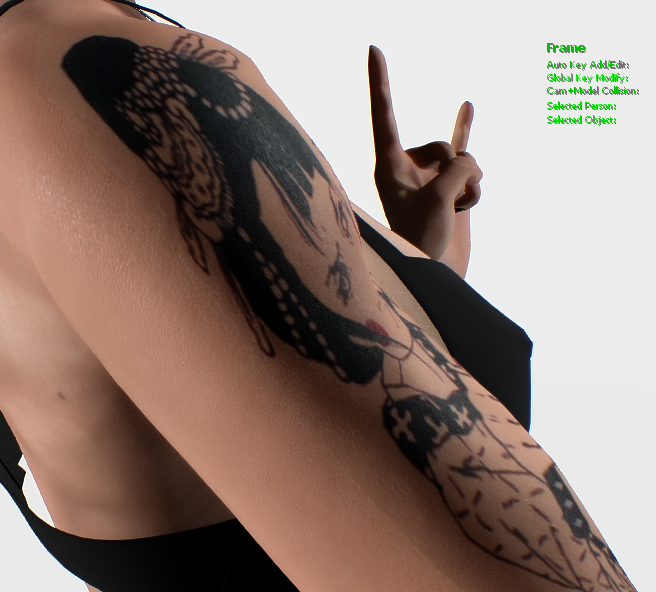
Aviso: Eu coloquei a primeira tatuagem no braço, mas ele não encobre todo ele, como podem ver. Podem notar uma discreta linha que no braço, ela é onde a textura da pele termina e se conecta com outra parte. Colocar uma imagem ocupando essa parte é muito complicado. Eu tentei fazer, mas estava tomando tempo demais para este tutorial, então desisti. Temos dificuldade semelhante para tatuagens completas de costas. Mas eu prometo que farei um "tutorial avançado" cobrindo essas partes complicadas.
The second type of tattoo is the self-made one, the one you do from scratch; well, it can be any image really, but it requires some artistic skills.
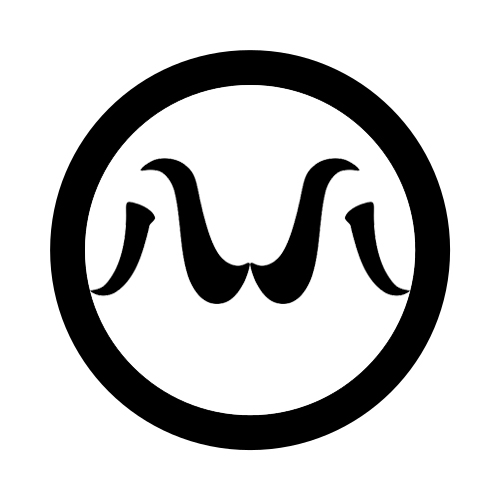
Mari's second tattoo is her personal symbol that she made when she knew her genetic mother better and trained karate with her. The tatto in itself is an stilyzed "M" based on the Nagoya seal. She just added another Maru Ni Hachi and inverted it, creating an "M".
To do this tattoo was no easy feat. The easy part was doing the drawing. I drawed the circle in photoshop, copied the Maru Ni Hachi twice, inverted one and added them in the circle, voilà. Sorry for lacking better explanation, but it's not the scope of this tutorial, my goal here it's just to show how to prepare images and place them on your model textures.
O segundo tipo de tatuagem foi uma feita do zero, não precisa ser uma tatuagem, mas requer habilidades artísticas.
A segunda tatuagem de Mari é seu símbolo pessoal que ela fez quando conheceu sua mãe biológica melhor e começou a treinar Karatê com ela. A tattoo em sí é um "M" estilizado baseado no Símbolo de Nagoya. Ela apenas adicionou um segundo Maru Ni Hachi e o inverteu, criando um "M".
Para fazer essa tatuagem não foi um feito fácil. A parte fácil foi fazer o desenho. Eu desenhei o círculo no photoshop, copiei o Maru ?Ni Hachi e o colei duas vezes, invertendo o segundo, os colocando nessa forma de "M" no círculo, voilà.
Me desculpem, mas o tutorial é apenas para preparar e colocar imagens nas texturas de corpo do modelo para customizá-los, ensinar a desenhar e todos os truques do photoshoop está fora do escopo deste tutorial.
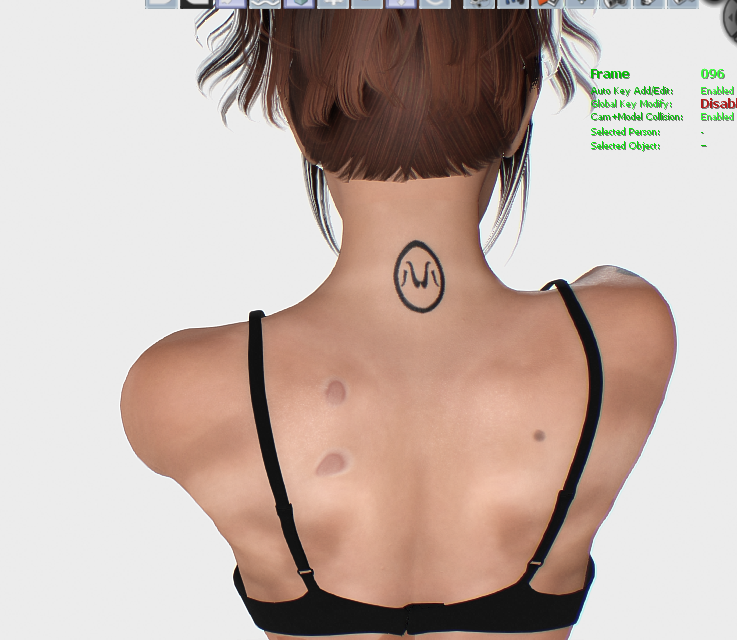
The hard part was placing the tattoo:
To place the back of the neck tattoo, you need to place the images on the red circle. You read rigt THE IMAGES.
A parte difícil foi colocar a tattoo.
Para colocar a tatuagem nas costas da nuca, você deve colocar as imagens nos círculos vermelhos. Voccê leu certo, AS IMAGENS.
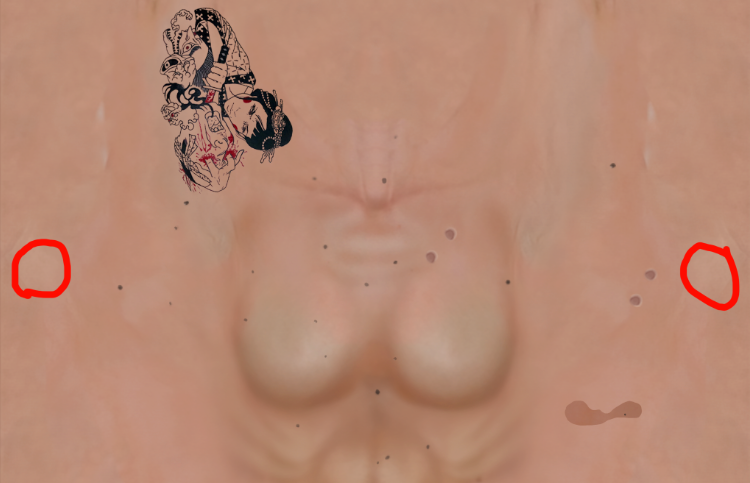
The back of the neck works like the back, they are split between the borders of the texture and connects with the other border, so you need to place two images of the tattoo on the circle, one of them must be inverted (Edit - Tranformation - Horizontal Tranformation, remember?). I recommend working with one image at a time, so when you are satisfied with one half, you go work on the other. This process may take time and requires both the game and the image editor to be open simultaneously, but don't you worry. I'll show all the tricks I know on the advanced image placing tutorial as I promised!
As costas da nuca funcionam como as costas, ela é dividida entre as bordas da textura e se conectam no jogo com a outra borda. Então você precisa colocar as duas bordas one está indicado no círculo e uma delas precisa ser invertida horizontalmente (Editar - Transformação - Transformação Horizontal, lembra?). Eu reocmendo trabalhar primeiro com uma delas até ela ficar perfeita, depois alinhe a outra de acordo. Este processo pode tomar algum tempo e requer que tanto o jogo quanto o editor de imagens estejam abertos ao mesmo tempo, mas não se preocupe. Vou mostrar todos os truques que eu sei no próximo tutorial de colocação de imagens avançadas como eu prometi!
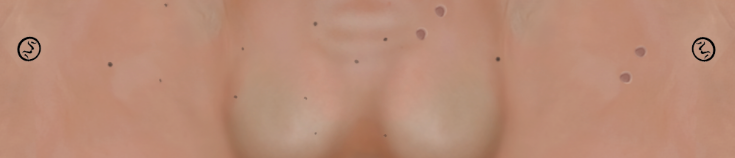
At the end I had to slightly flatten and distort the images and put them in the right angle. This is the final result!
No final, eu tive que achatar as imagens de leve e distorce-las e coloca-las nos angulos ceros. Este é o resultado final!
Now, the nex type of tattoo - they are simple and small images placed on simple places of the body texture. Like the moles, they don't require much work, shall we?
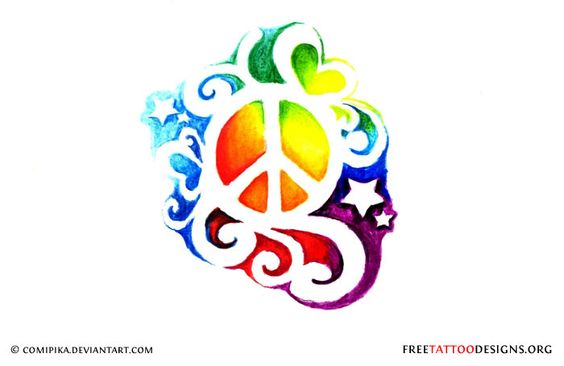
After Mari went back from Pakistan, she as really shocked by all the violence she lived there, and specially saddened by her bullet scars. So she decided to hide them with tattoos!
The tattoos she chosen where the Peace and Love Symbol, and the a Bee (it's her "spirit animal"); So I chose these two images:
Agora o próximo tipo de tatuagem - elas são simples e pequenas imagens colocadas no corpo, muito parecido como as pintas e cicatrizes que fizemos. Eslas não requerem muito trabalho, vamos lá?
Depois de Mari voltar od Paquistão, ela ficou realmente chocada com toda a violência que ela testemunhou lá, e ficou especialmente triste com as cicatrizes que os ferimentos de bala deixaram. Então ela decidiu escondê-las ocm tatuagens. As tatuagens foram um símbolo de paz e amor, uma abelha (o animal espiritual dela), então eu escolhi essas duas imagens: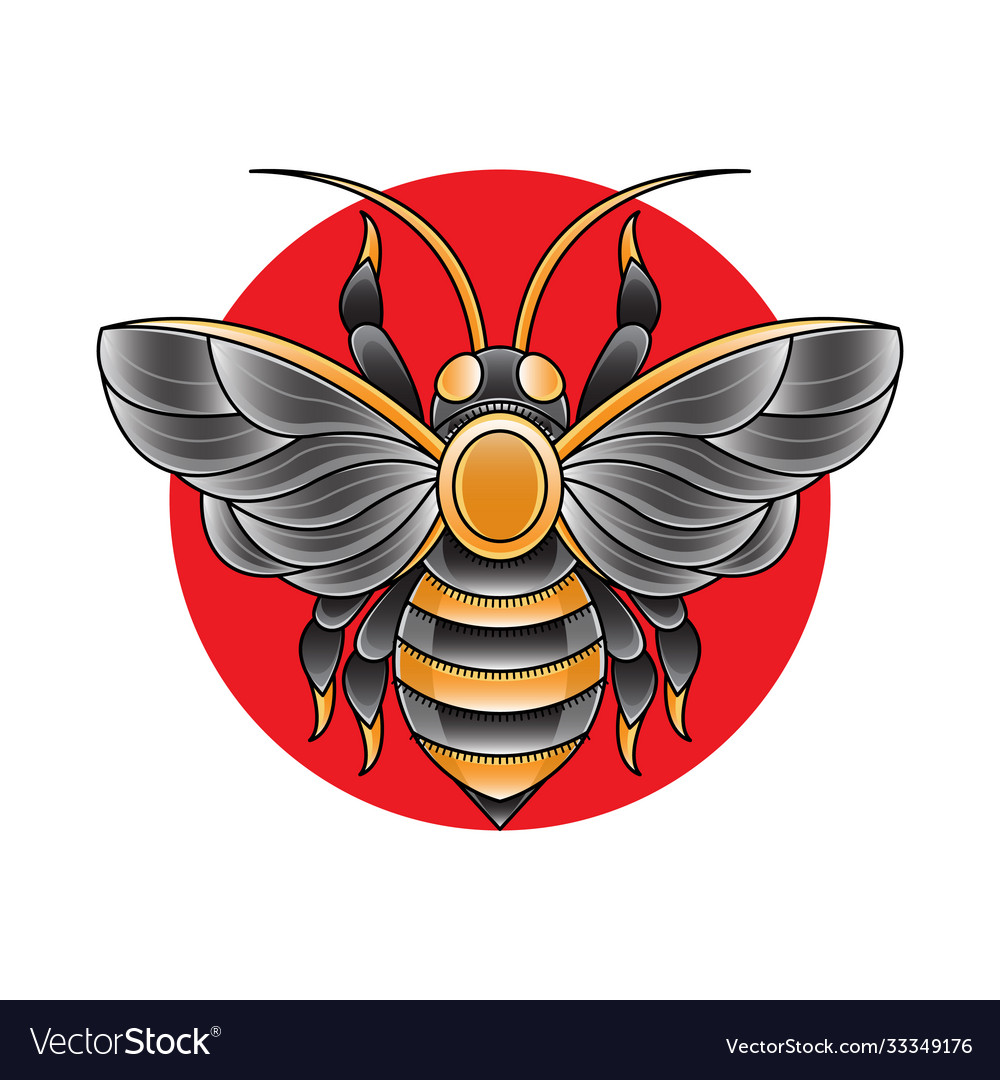
At this point you already know how to prepare harder images than those and add them on the body texture.
Neste ponto você já sabe como preparar imagens mais difíceis que essas e adicioná-las a textura de corpo. 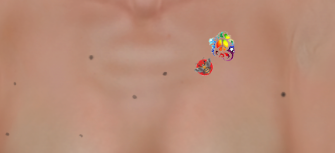
Well, only some tattoos are left to finish Mari's tats, The piece lilies on her right flank and the Doll of secrets on her left side of the back. One interesting tool I missed to show you is this:
Bem apenas mais algumas tatuagens sobraram para terminar as tattoos de Mari, os Lírios da paz no seu flanco direito e a Boneca dos segredos nas costas esquerdas dela. Uma ferramenta interessante que eu esqueci de mostrar, é a ferramenta borrar. Ótima para "amaciar" as partes mais pixeladas de uma imagem: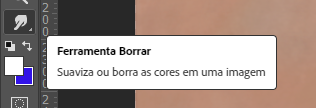
It's the smudge tool. It's great to soften some sharpened edges of some images.
Chose the smudge and pass it over the sharpened edges you want to soften.
(More about the Smudge Tool here!)
Escolha e ferramenta borrar e passe ela nas bordas para suavizar a imagem.
(Mais sobre a feramenta borrar em Inglês aqui!)

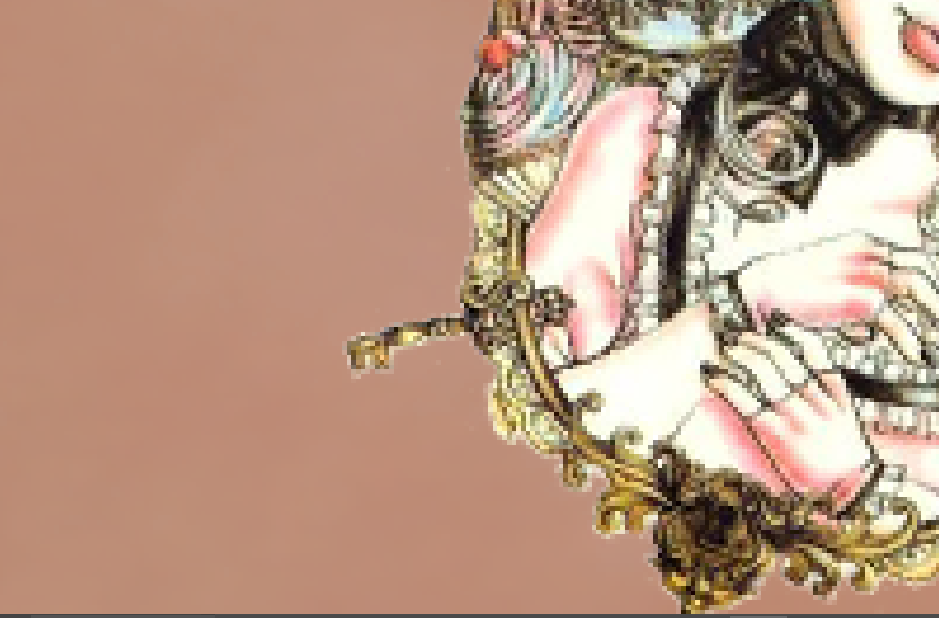
Before Antes After Depois
Don't forget to save everything in different layers and in .psd!!
Não se esqueaça de salvar tudo em diferentes camadas e em .psd!!
And here we are! Mari with all her tats!
E aqui está! Mari com todas suas tats!

You may notice that some details disappeared. There's no hints of the scars behind the tattoos, and that's unrealistic. No problem! next tutorial It's the advanced skin texture customization! There, I'll show how to place advanced images (specially the images on the borders of the textures) and how to make normalmaps (So the scars will become more noticeable even behind the tattoos!!)
This is my first tutorial and I would love to read some criticism on how to improve it. Thanks guys!
Vocês podem ter notado que alguns detalhes desapareceram. As cicatrizes de bala sequer aparecem, e isso é não realista. Sem problema! Próximo tutorial será sobre tecnicas avançadas de personalização de textura, isso inclui colocação avançada de imagens (especialmente na borda da textura) e como fazer normalmaps (assim as cicatrizes irão ser notadas mesmo com as tatuagens em cima!)
Este é meu primeiro tutorial aqui, e eu amaria ler críticas em ocmo eu poasso melhorar. Obrigado!
-
 3
3
-
 2
2
-
 1
1


1 Comment
Recommended Comments