

Photoshop Tutorial 1: Getting Dat Vibe

Hey everyone! I'm at work right now, so I'll try and make this one super quick. I'm not sure how many entries I will do on this. I guess it depends on what you folks ask for if there's any interest.
DISCLAIMER: This is meant to be a very basic guide written by a mentally challenged person. This is not:
1. An extensive tutorial on how to use Photoshop.
2. A step-by-step all-in-one solution to picture issues.
3. The formula to get your girlfriend back 
As I stated, this is a basic guide and the tips and tricks displayed here will have to be adapted to each and every scenario. Every picture is different and there are tons of factors that will determine what tools you should use. This tutorial is based on TK17 screenshots taken with Hook4 on a VERY NICE room texture that you can find and try for yourself right here:
Now, on with the tutorial. I'm working on a series of mini-comics with some of my lovely ladies and this texture uploaded by @Ghostbear was the inspiration for it. As I mentioned before, I use Hook4 because of computer performance issues, but this room right here is almost as if I had H5 installed on my system. I know it slows down as much lol! Keep in mind that this tutorial is based on this specific room, but any room where you use H4/H5 will do. Let's begin.
As I mentioned on a previous entry, Hook4 on my computer works rather strangely. It really darkens a lot of rooms but there are usually these "beams" of light or very bright sections to it, even when using an indoor location. I don't know why this happens, but since H4 doesn't have a GUI like H5 does, I don't want to go through editing each room texture's level_definition files since I don't know what the fuck I'm doing. This will only cover the screenshots taken. And with that being said, here's the test subject for today.
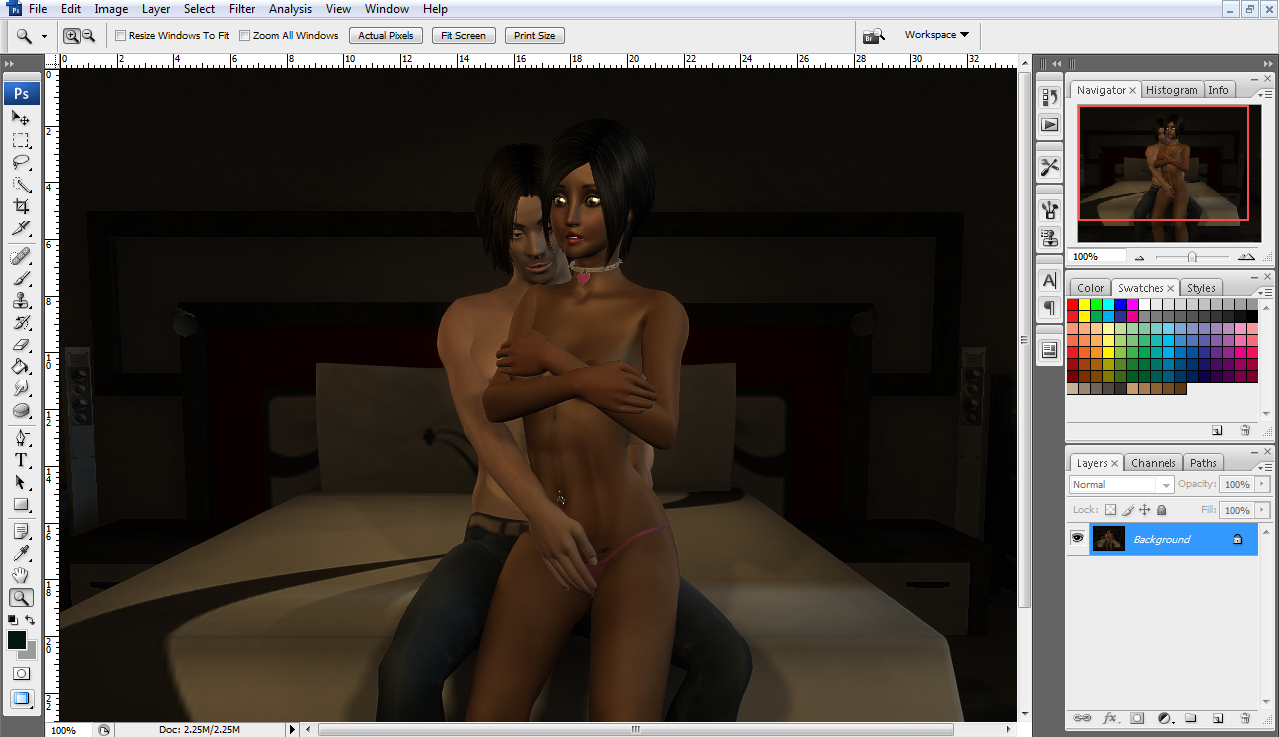
DISCLAIMER: This is Nanno Chairat from Thailand. Yes, she is a very tiny Asian but she is 28 years old. It doesn't show well on these pictures, but she has tattoos. She is perfectly legal and her appearance here isn't breaking any KE rules. This is also my only model with such an appearance and again, SHE IS PERFECTLY LEGAL and she *might* be modelled after a former fuckbuddy of mine. Real good times. With that out of the way, we move.
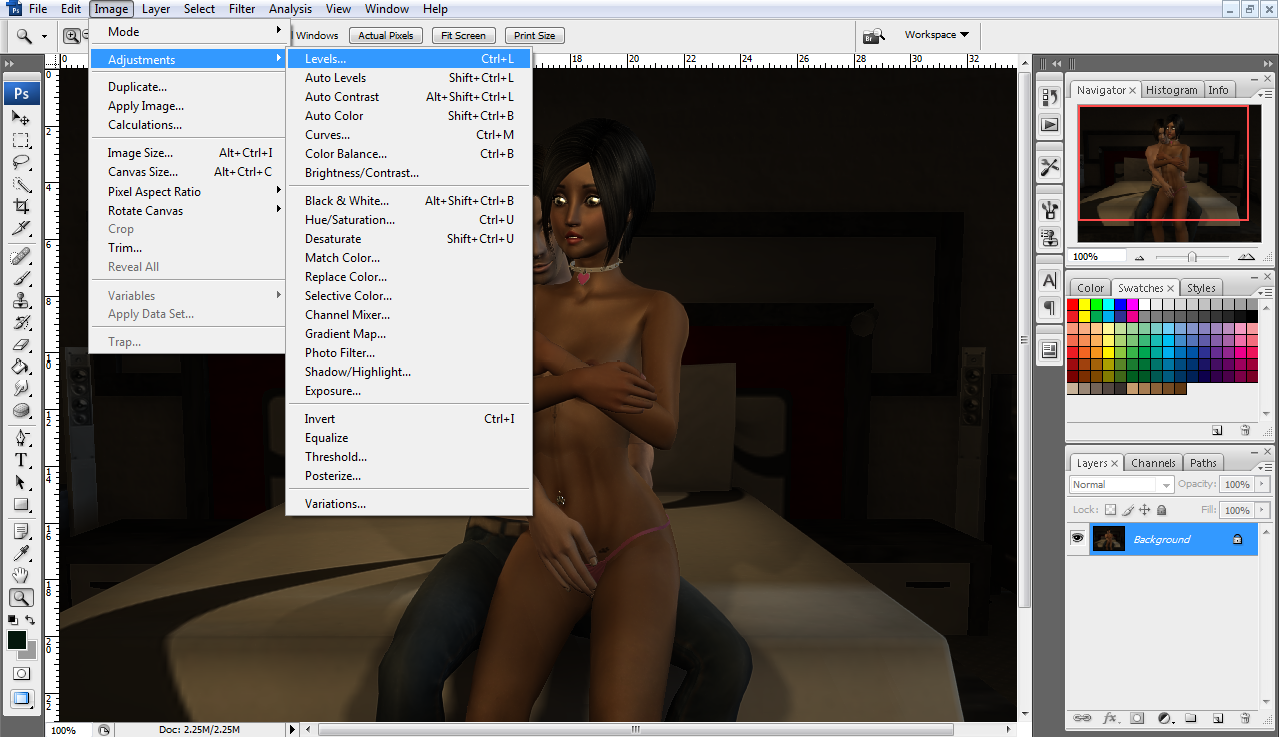
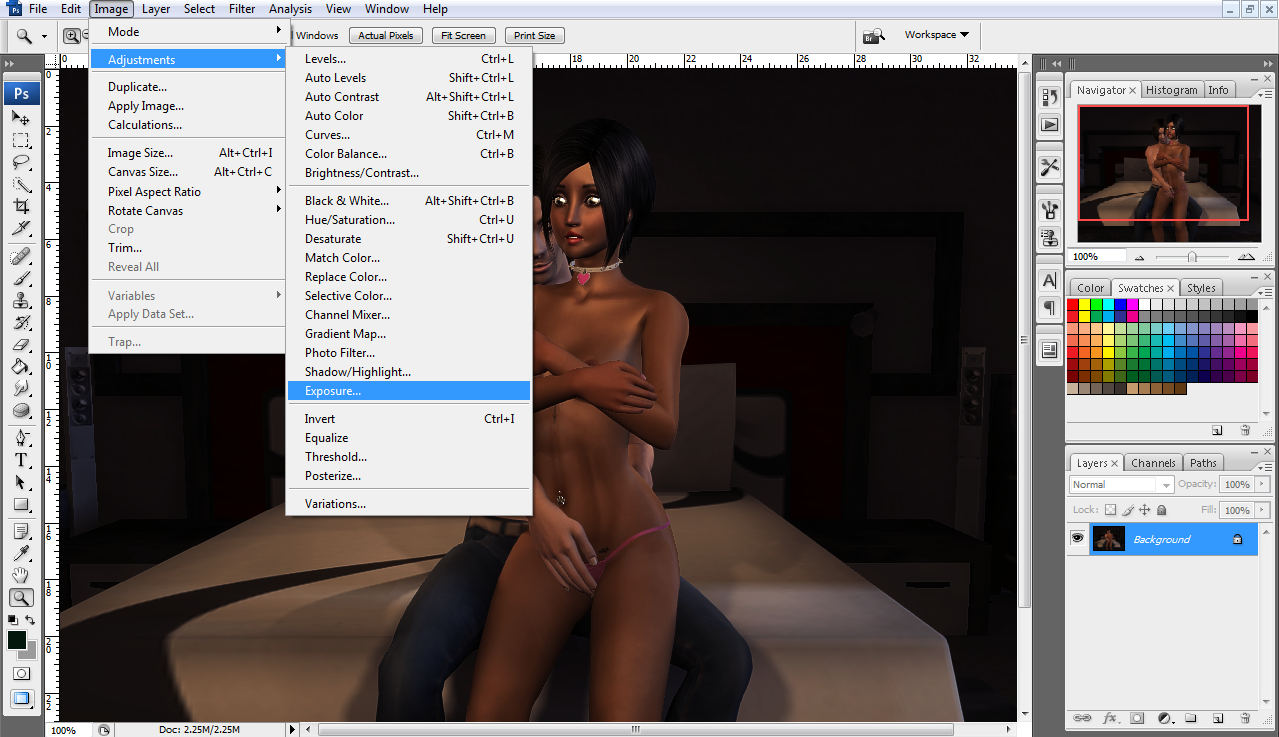
I'm using Photoshop CS3 for my photo editing software. I am aware that there are far more modern versions of it, but this is what my POS computers can handle. If you use more recent versions, the same tools are available for you. If you use something like GIMP, you should be able to see similar tools in it. This is my unedited photo. It's looking good but it still suffers from several issues. Namely, a dark background, low saturation and for some reason, the eyes are covered in this very heavy glow that makes them look creepy af. So, the first thing I'll usually do for this is hit every pic with the Levels tool, so go into the Image option at the top menu bar.
The Levels tool works in four different ways. First, you have RGB, which controls the amount of overall Brightness of the picture. Then, it has three sub-levels: Red, Green and Blue. With Red, you can tint or saturate your picture to Red (right) or Cyan (left), Green (right) or Magenta (left), and Blue (right) or Yellow (left). I use these very sparingly, as each room is different and depending on whether the textures have a day or night sky is the amount I will usually calculate, but it is recommended that you don't oversaturate your image at this point. I use it strictly as an ambience tool. This tool has an on-screen Preview which will let you see how the picture is affected. Also, it allows you to save your changes!
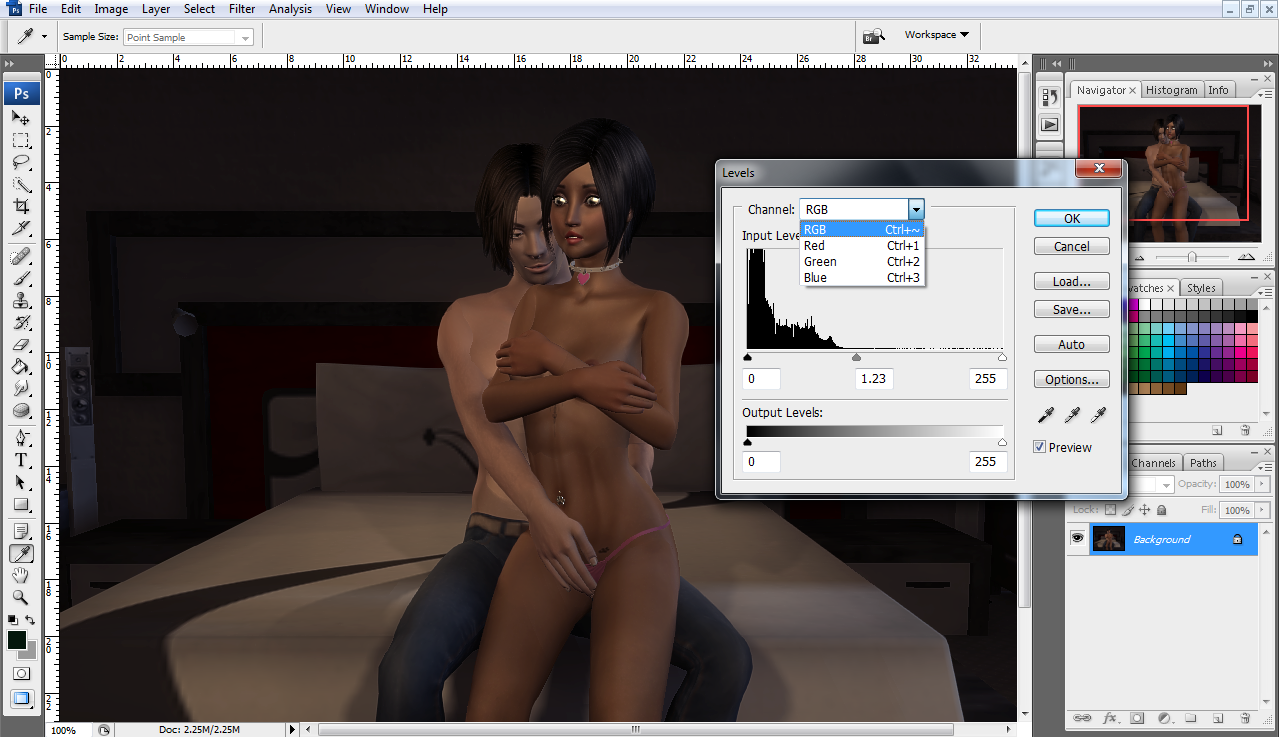
The Shortcut for the Levels tool on Photoshop is Ctrl + L. Load your presets with L and choose the file. Load and select Ok.

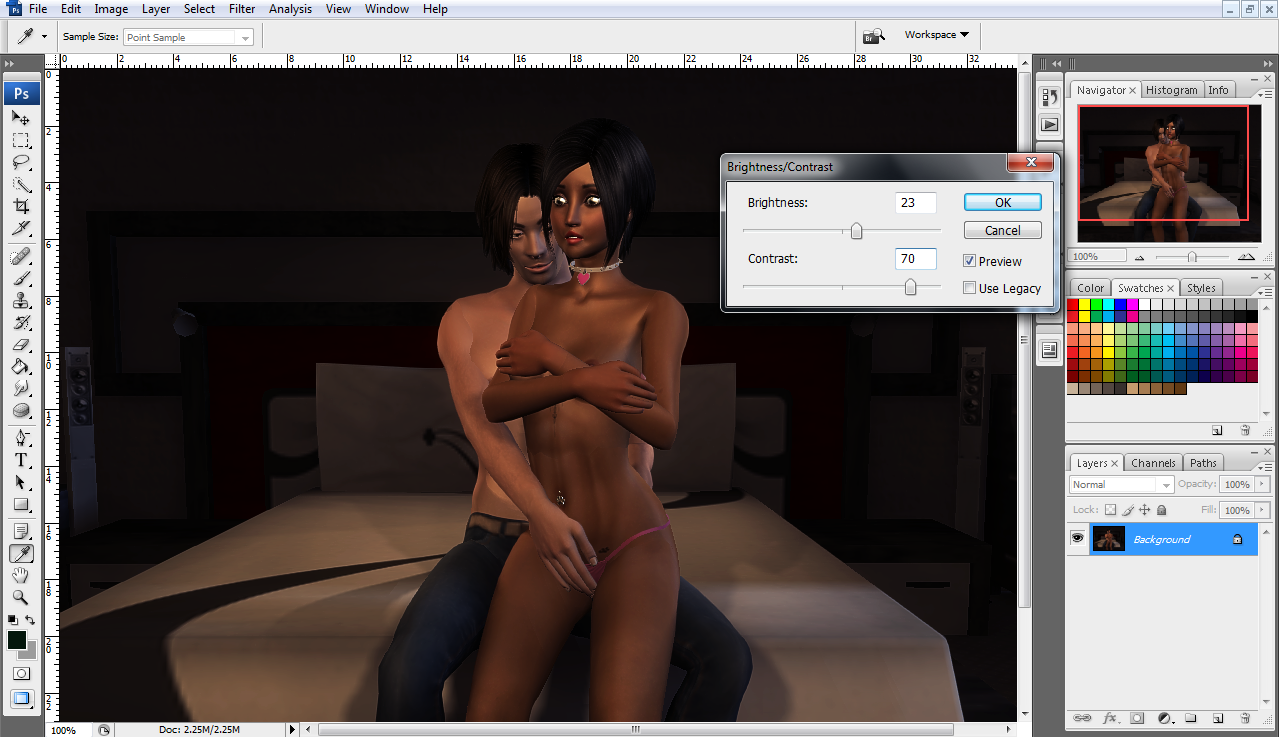
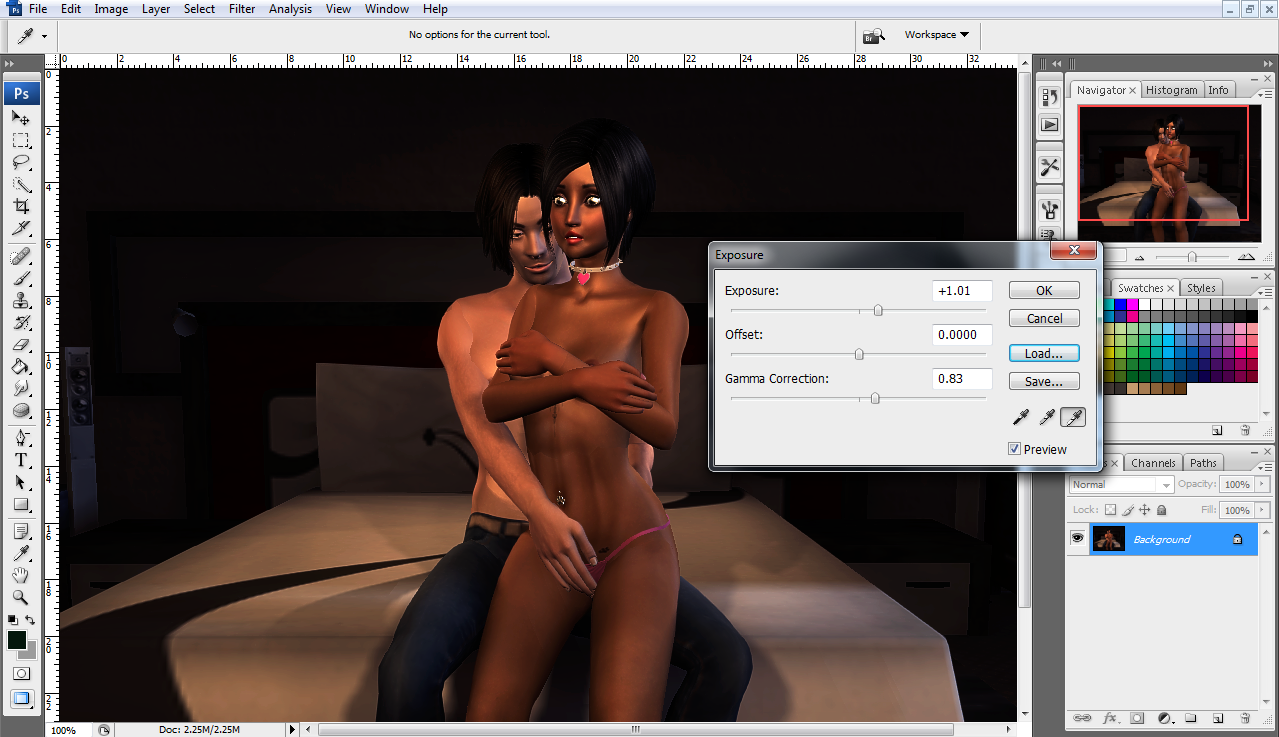
Next, is Brightness/Contrast. This tool adjusts said parameters of your pictures and it is the one thing I reach for the most since my TK17 screenshots are very dark at times and I usually have to max out Brightness for the pics to look decent and use Contrast to balance things out. In this case, however, I use far more Contrast to saturate the image a little more. I'm looking for a night-time kind of look, so using more Brightness would ruin that. With this, my image is looking pretty decent already! Also worth noting is that neither this, nor the next tool have any shortcuts, so you have to use them by going to the drop-down menu at the top of the screen.
Now, what I'll do for every single pic next is use the Exposure tool. I couldn't explain to you what this does, but make sure to use it sparingly as well, since it can cause several weird effects on your pictures and it will destroy the natural look of them. I want to get slightly more saturation and definition from the image, so that's what I use it for. This works similarly as the Levels tool, but this only has three sliders: Exposure, Offset and Gamma Correction. Again, use these sparingly. Both these Tools will turn the cursor into an Eyedropper which will sample a specific color, so make sure you don't click on the image while this special cursor is on. If you do, you might not get the desired effect for the rest of your gallery.
And that's it! Now my pic is looking pretty damn good! This is it for Part One of this tutorial. The second part will be all about using a Tool that will be your best friend for editing those nasty lines we sometimes get on the joints of our models. See you there!
Part 2 - The Smudge and Brush Tool
-
 3
3

3 Comments
Recommended Comments